Good news for API users, we have just released an Interactive API Docs feature in the Veryfi Portal (Hub). You can now try out Veryfi’s API while viewing the documentation directly on the Veryfi website.
Interactive API Docs currently contain both v7 and v8 of Veryfi’s API for data extraction.
Step 1 – Portal
To get started, first navigate to the Veryfi API Portal https://hub.veryfi.com/ and sign in with your API account. If you don’t have an account you can signup with just your email and be up and running in minutes.
Step 2 – Navigate
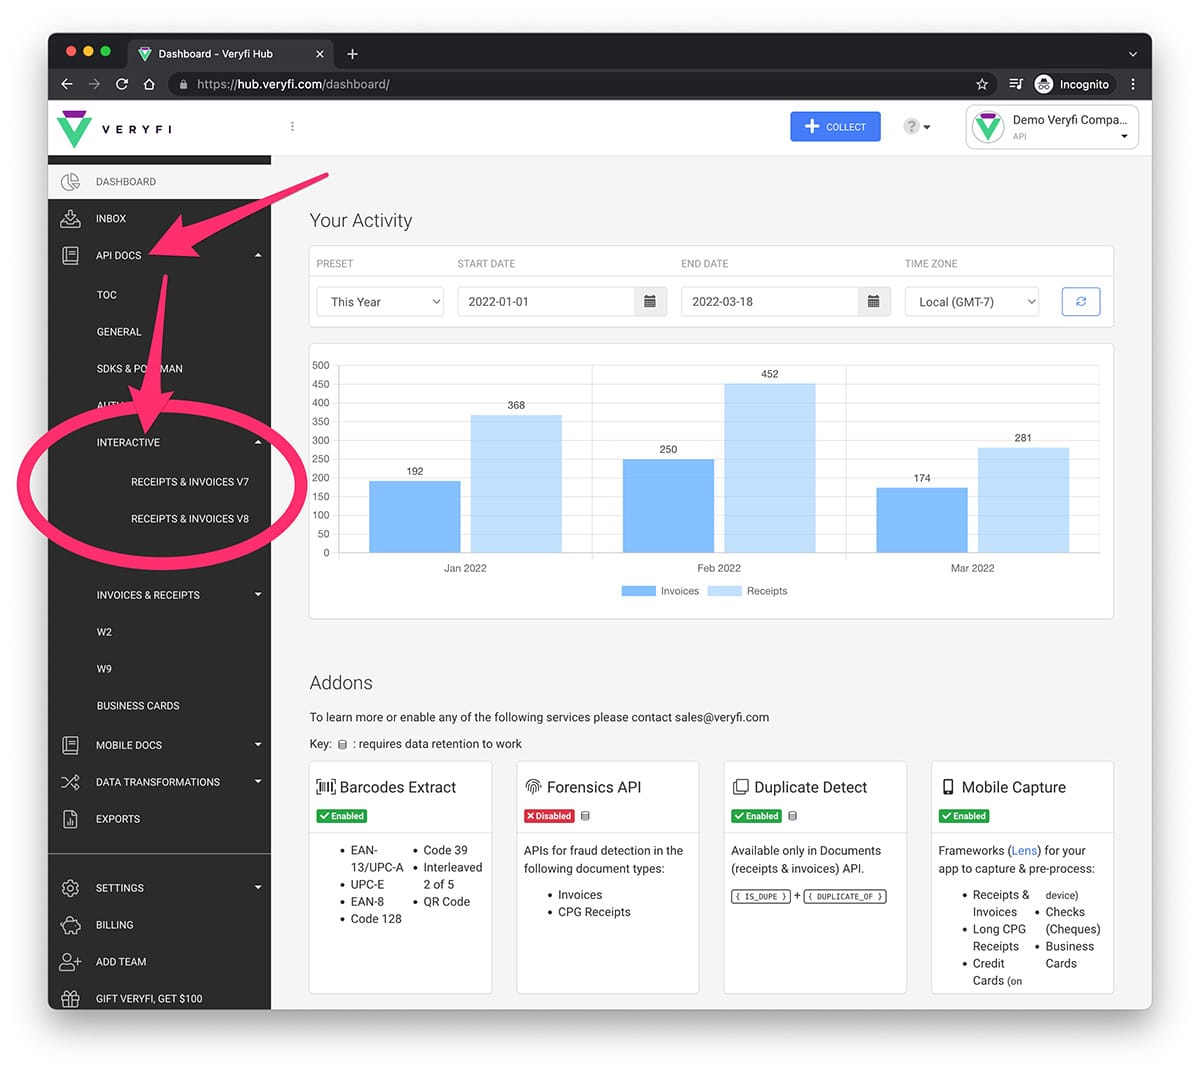
You’ll now see 2 options for v7 API and v8 API. You can start clicking either of these to start playing with the API.
Step 3 – Authentication
If you want to follow along, we’re going to use the v8 API opinion in the rest of this guide. You’ll land on a page that looks something like this:
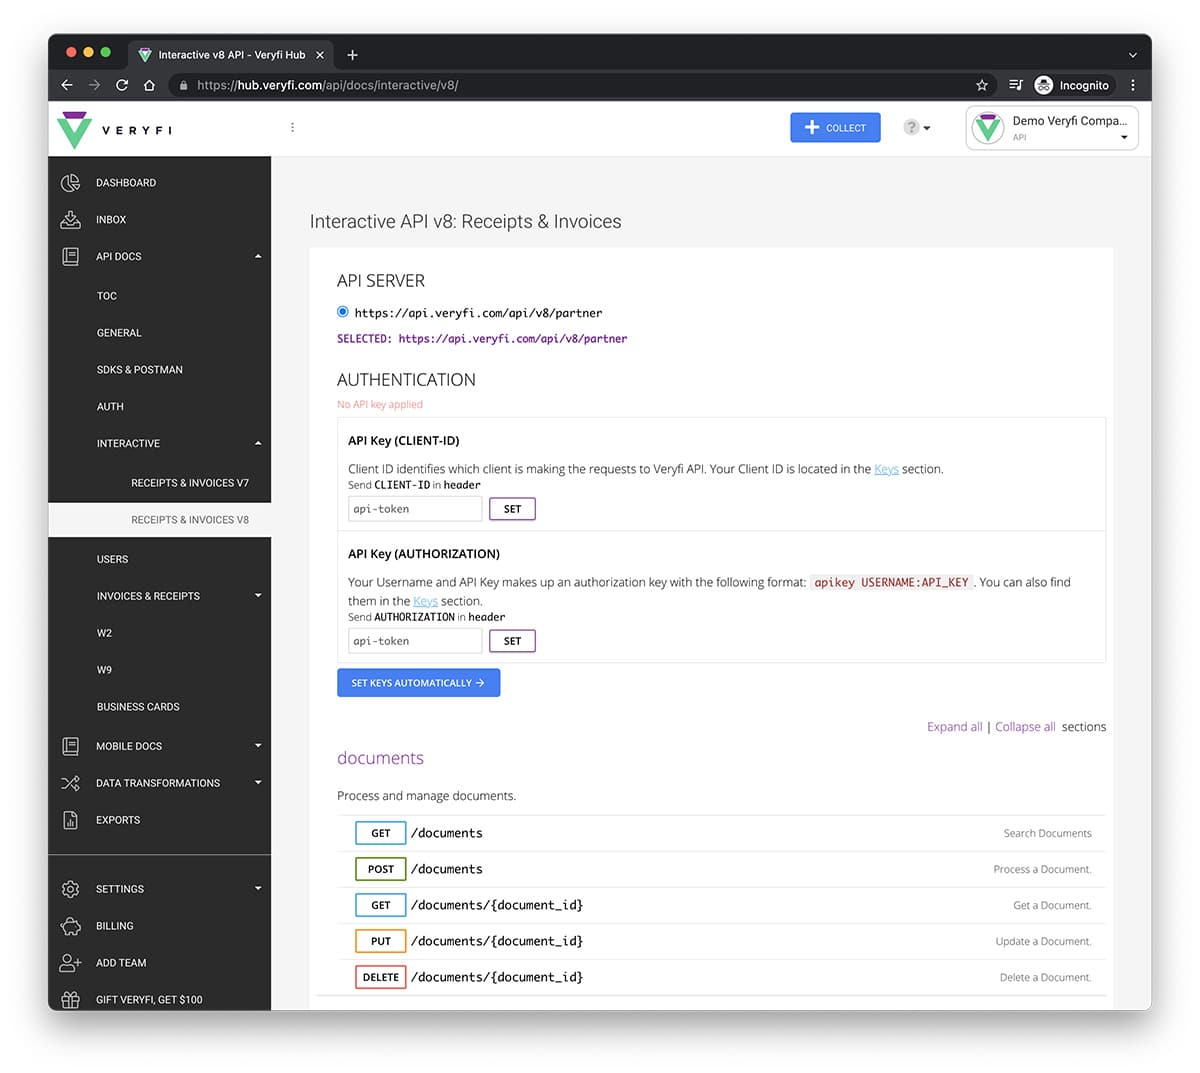
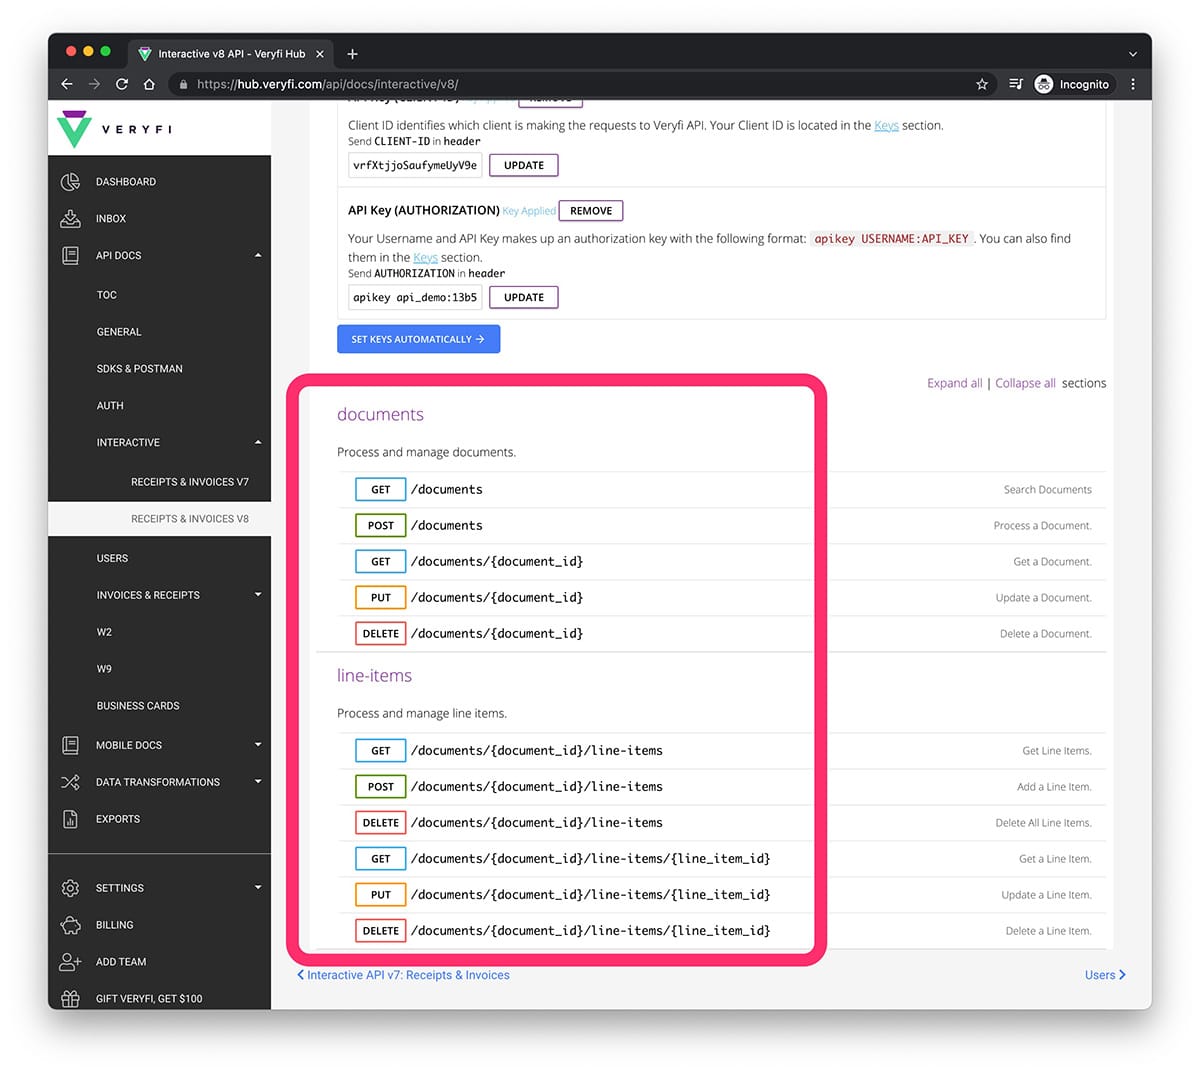
You’ll see that there a couple of components, such as:
- API Server: The base URL that you’re going to use.
- Authentication: The combination of 2 API Keys, Client ID and Authorization, to authenticate your API requests.
- Documents or Line Items: List of documents or line items endpoints for receipts or invoices.
Step 4 – Set Keys
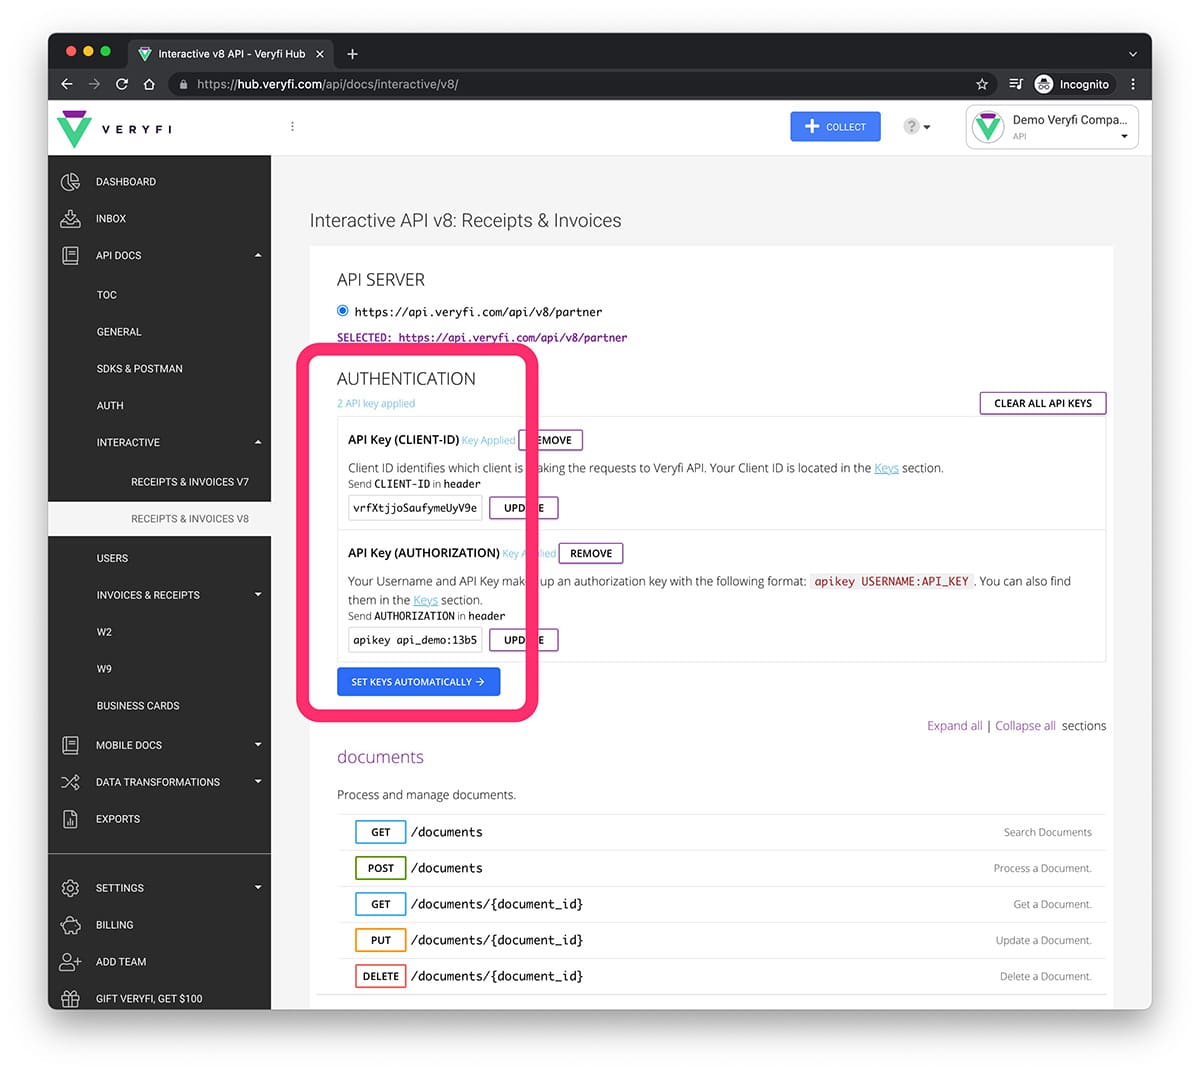
Now, in order to start interacting with different endpoints, you’ll need to input two API keys in two corresponding input boxes under the Authentication section. You can click on the “Set key automatically” button to apply your credentials automatically instead of navigating back and forth to the keys page to copy/paste.
Next, we’re going to try out the GET /documents endpoint to retrieve previously processed documents we had so far. Once you’ve clicked on the endpoint’s row, you’ll see a Request and Response section.
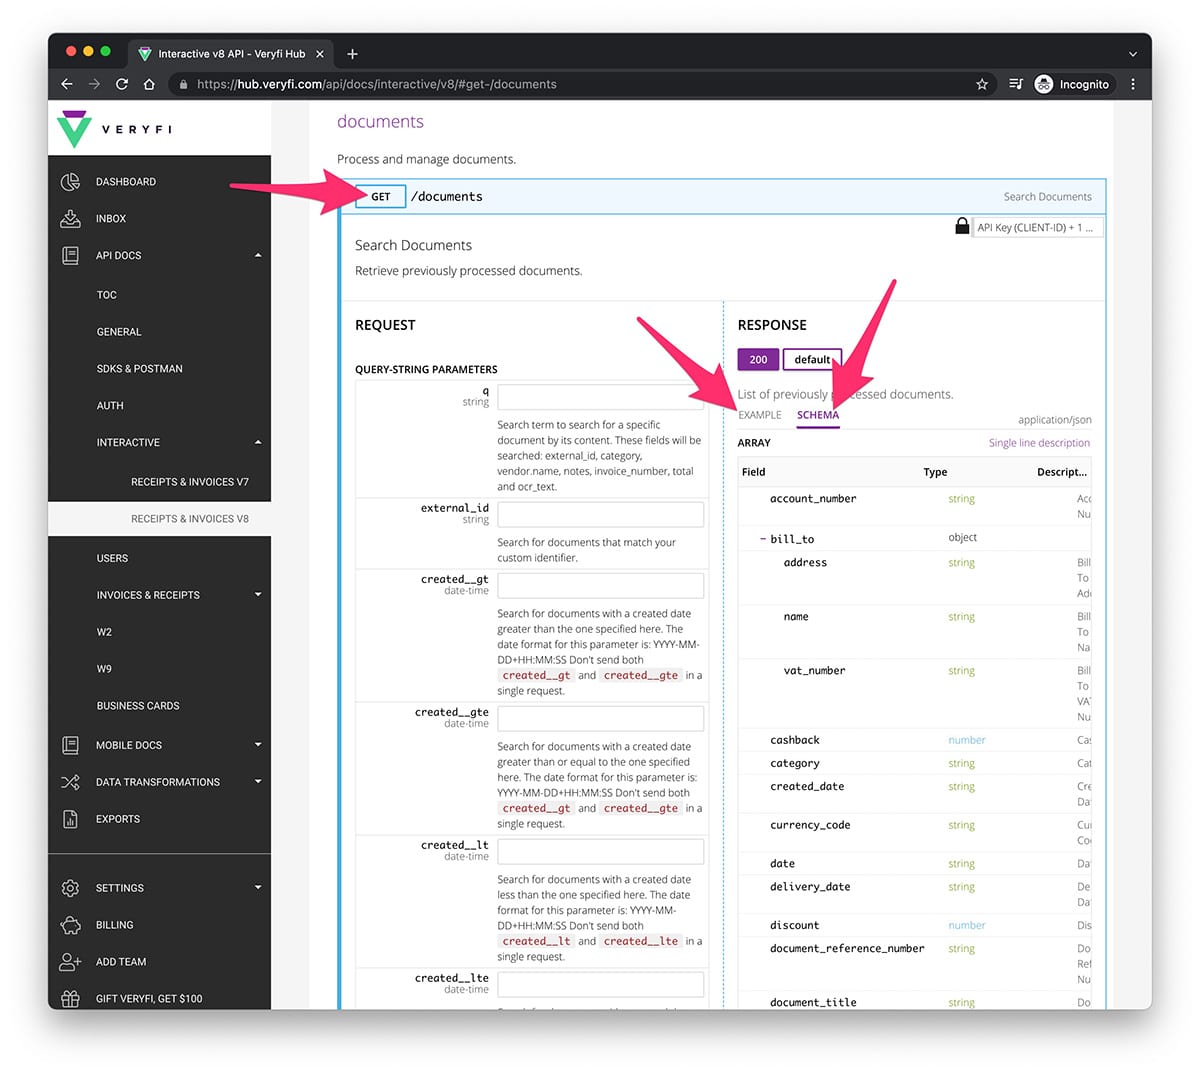
Request gives you all the parameters that you can use in your request with their types and descriptions while Response gives you the schema of the expected JSON response. You can also see an example response in the Example tab. Below Request, you’ll see a Try button and actually call the API and get a response back in the browser.
Once you’ve tried it, you’ll see if the response is successful or not successful, the time it takes to process the request, and the formatted JSON response. You can also check out the Response Headers as well as the Curl request for more additional information.
Step 5 – Example
For the following example we will fetch a real document by it’s ID. This is much faster then doing a GET on a long list of Documents.
1. Get your Document Id
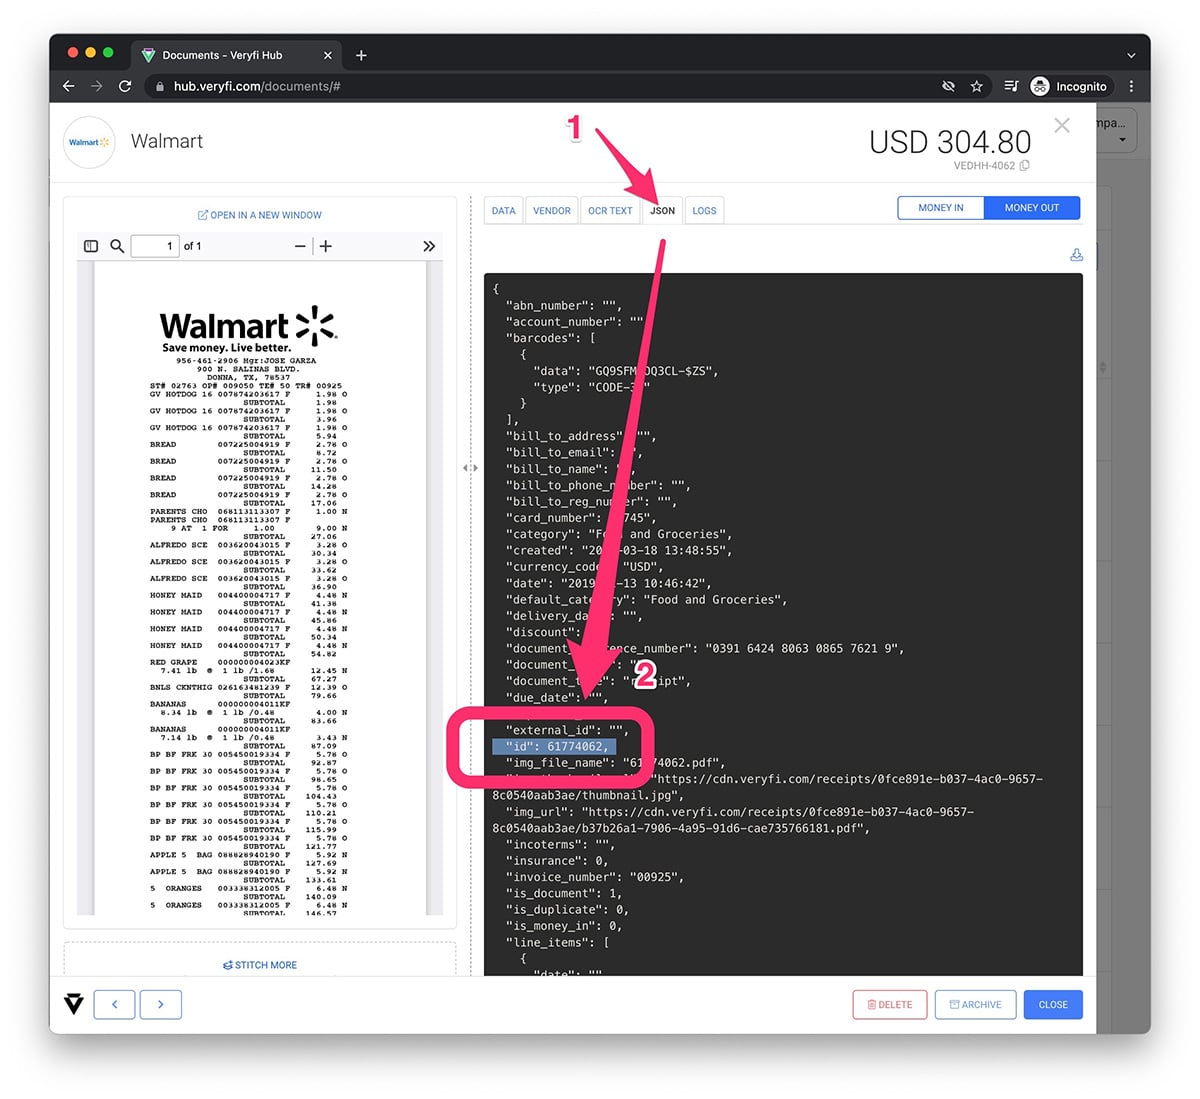
Inside the API Portal, navigate to your Inbox and select any document you like by clicking it’s blue VIEW button to open document detail. Finally press the JSON tab (as shown below) to view it’s standardized JSON where you will find it’s document id under key “id”. Note it down. This is the document ID you will use in the interactive demo (next step).
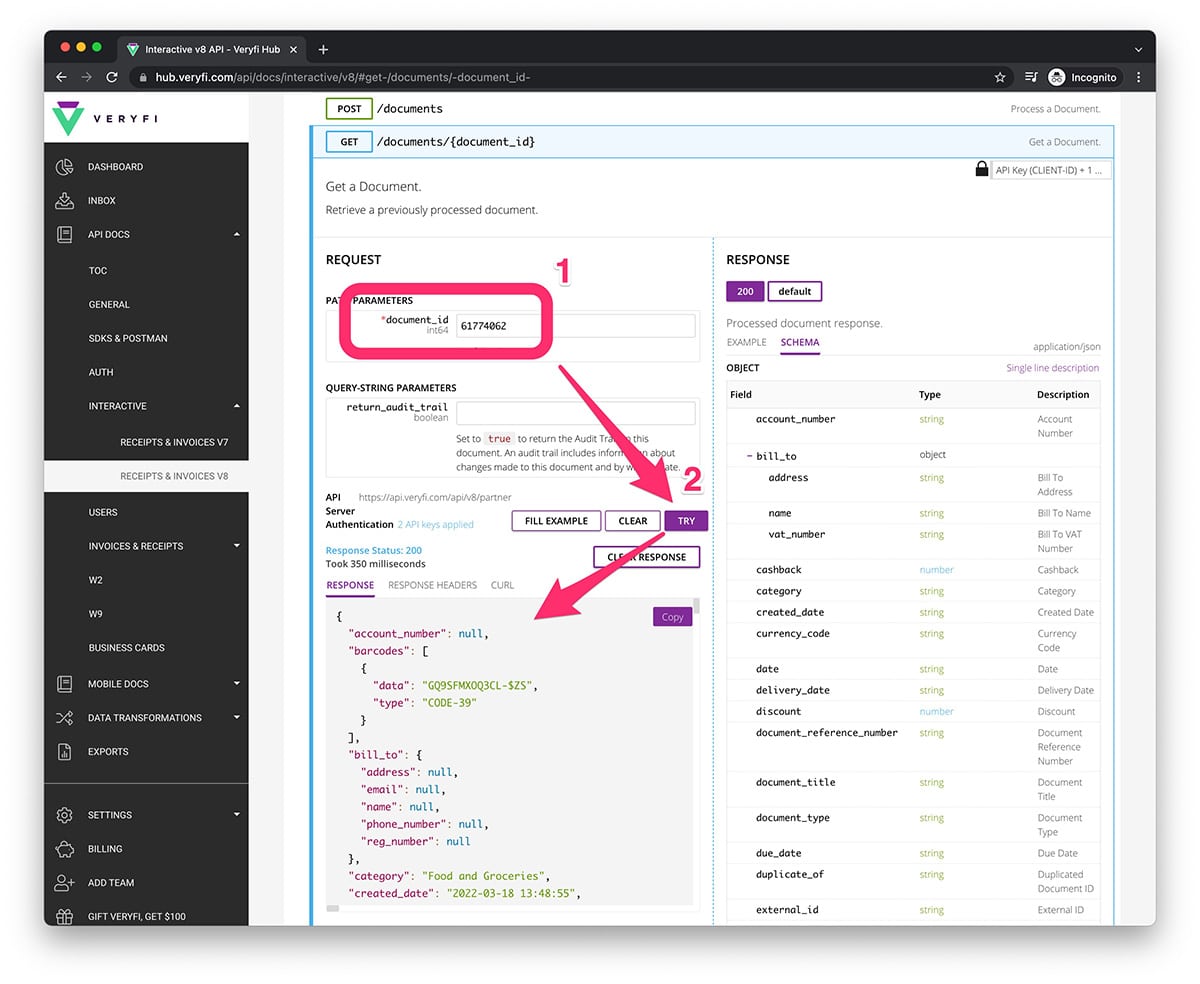
2. TRY Document Id in Interactive Mode
Go back to the Interactive Mode and under GET /documents/{document_id} using this ID, “Try” the Interactive Mode.
Congratulations on making it all the way here! Hope you found it intuitive and helpful. You can keep trying out different endpoints following the same process. If you find any bug reports and feature requests, please reach out to us at support@veryfi.com.
Good luck and happy hacking!
Special Thanks!
Thank you Hoanh @ Veryfi for the stellar write-up.
